Easy Chick Brooder Setup for Beginners
Bringing Chicks Home with Easy Chick Brooder Setup
Let me show you an easy chick brooder setup. We just brought home another round of chicks. This year we are going to try setting up our brooder a little differently by using an outside coop we have. We will run the heat plate to it for warmth and check on them throughout the day. But with our family size and ages, having little chicks in the house is probably not too safe from toddlers right now.
Raising chicks is one of our favorite springtime traditions. Every year brings a few changes as we learn more about what works best for our home and flock. Chick season is busy but joyful, and there’s something special about those first weeks of their lives.

A good chick brooder setup can make all the difference. A safe brooder box, the right brooder bedding, and a reliable heat source are key. You’ll also want to think about things like water containers, chick-sized feeders, and how much space your chicks will need.
Whether you’re using a heat plate brooder or trying traditional heat lamps, your baby chicks will need warmth and care. Getting your setup right in the first week will help support healthy chicks and fewer stress-related problems.
If this is your first time raising chicks, or you’re just looking to simplify, this guide will walk you through each step. Let’s get your chicks started with an easy brooder that works for you.
Choosing the Right Brooder Box for Chick Brooder Setup
A brooder box is a safe, contained space where new chicks live during the first weeks of their lives. It keeps them warm, clean, and protected. A good brooder setup also gives baby chicks easy access to food, water, and brooder litter. During these early weeks, chicks cannot regulate their own body temperature. That’s why a safe heat source and stable setup matter so much.
What We’ve Used for Our Chick Brooder Setup
We’ve tried several brooder box options over the years. We started with a kiddie pool one spring and used a plastic tub with a plastic lid the next. Last year, we tried a stock tank setup. Each option worked well in some ways but also came with challenges. This year, we’re using an extra chicken coop as our brooder. It gives us more space and keeps the chicks outside, which is a good idea with our toddlers in the house.
Plastic Totes and Cardboard Boxes
Plastic storage totes are a popular choice for small chicks. They’re easy to find at feed stores and hold heat well. You can cut vents into the side of the tote and place a plastic lid loosely on top to prevent drafts. But totes get crowded fast and usually don’t offer enough space for larger numbers of chicks.
Cardboard boxes are another simple solution, especially for a couple days. They are affordable and easy to replace. But cardboard can become soggy with spilled water and may collapse over time. A plastic tub lasts longer and is easier to clean, though you’ll still need to watch for temperature fluctuations.
Stock Tanks and Kiddie Pools
A stock tank offers great protection. It’s deep, sturdy, and holds heat well. We liked this option when we had a larger number of chicks. It gave them enough space and worked well with a heating plate brooder. Cleaning the bottom of the brooder took more effort, but the safety and warmth were worth it.

We also tried a kiddie pool with chicken wire around the sides. It was roomy and offered lots of airflow, but we had to cover the top with hardware cloth to prevent chicks from jumping out. This setup needs a smooth paper surface or brooder bedding on the floor to protect the chick’s legs.
Puppy Playpens and Outdoor Coops
Some families use a puppy playpen to keep chicks in a safe corner. This gives adequate space and makes cleanup easier. It’s a good option indoors if you have the right brooder bedding and a safe heat source.
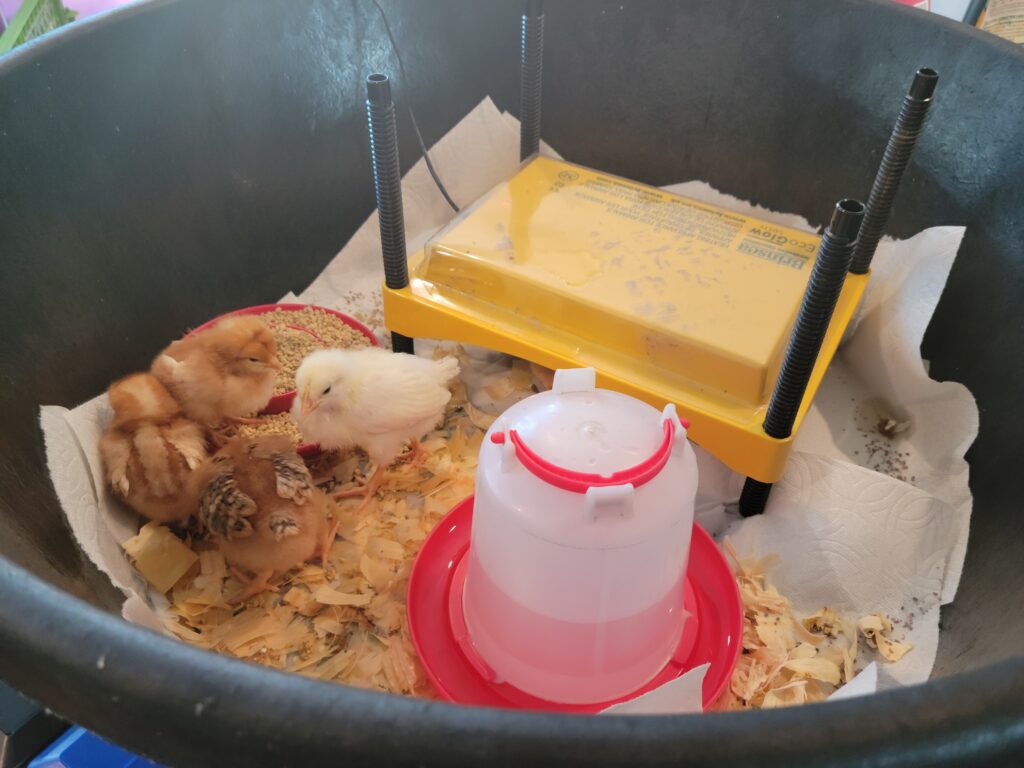
Our current setup is an outdoor chicken coop. We are running a heat plate to it and checking often. It gives the chicks enough space and keeps the mess out of the house. It also helps us avoid food waste, dust, and toddlers tipping over water containers.

Space, Safety, and Cleanliness
No matter which brooder box you choose, make sure it provides enough square foot space per chick. Small chicks grow fast. A crowded brooder can lead to stress, pecking, and health problems. Happy chicks need room to move, rest, and grow.
You’ll also want to plan for how to line the floor of the brooder. Pine shavings, wood pellets, and hemp bedding are all good options. Avoid cedar shavings, which can cause respiratory problems. Some people use puppy pads or paper towels for the first few days, but those need frequent changing.
Keeping the brooder dry helps prevent disease and stress-related problems. Damp brooder litter can lead to cold chicks, dirty feathers, and infections. Choose a setup that helps you keep everything clean with less effort.
Temperature and Location Considerations
Temperature stability is another factor to consider. Some brooder boxes lose heat quickly or allow cold air to flow in through the sides. A well-insulated space with fewer temperature fluctuations will give your young birds the best start.
If this is your first time setting up a brooder box, start simple. Look at how many chicks you have, how much space they need, and how often you want to clean. Your choice of container can shape how well the rest of your chick season goes.
Setting Up the Floor of the Chick Brooder
Why the Right Brooder Bedding Matters
The floor of the brooder plays a big role in keeping chicks healthy and stress-free. Chicks spend all day walking, scratching, and sleeping on this surface. The right brooder bedding supports their legs, absorbs moisture, and helps control odor. Choosing safe and low-maintenance materials can make a big difference in your daily chores.
Our Experience with Paper Towels
We’ve used paper towels in the past, especially during the first week. They help chicks find their feed and offer good traction for tiny feet. But changing them constantly was a lot of extra work. With our growing family, it felt like we were always checking for wet spots and replacing soggy paper. The mess added up fast, especially with larger numbers of chicks.
Paper towels also tend to bunch up or tear, especially near the water source. While they may help small chicks the first day or two, they don’t hold up long term. That’s why we stopped using them and switched to pine shavings.
Switching to Pine Shavings and the Deep Litter Method
This year, we’re using pine shavings with the deep litter method. It’s been a great option for less cleaning and healthier chicks. The shavings absorb moisture well and help manage odor. By adding fresh shavings every few days, the bottom layer slowly composts, keeping the space drier and more natural.
The deep litter method also gives the chicks something to scratch through. This helps mimic the behavior they’d have under a mother hen. It gives them enrichment and helps reduce boredom, which can lead to pecking and stress-related problems.

We layer the floor of the brooder with a few inches of pine shavings and simply add more as needed. This creates a warm, soft base that helps keep the chicks comfortable. Compared to paper towels or smooth paper surfaces, it’s much easier to manage with less daily cleaning.
Other Brooder Bedding Options
Hemp bedding is another good option. It’s natural, compostable, and known for its high absorbency. Some families also use wood pellets under a thin layer of shavings. This combination helps control moisture near water containers and extends the life of the bedding.
Wood shavings are widely available and easy to work with. Just be sure not to use cedar shavings. Cedar releases oils that are toxic to baby chicks and can cause respiratory issues.
Smooth paper surfaces or puppy pads can be used briefly but don’t offer much traction. Chicks raised on slick surfaces may develop splayed legs or joint problems. The floor of the brooder needs to provide a steady grip as they learn to walk.
Choosing Bedding That Works for You
If you want an easy brooder setup with less daily work, go with natural brooder litter. Pine shavings or hemp bedding with the deep litter method is a great option. It supports chick development, reduces cleaning, and helps keep chicks warm and dry.
Healthy chicks need a clean, dry brooder with safe footing. Whether you use wood pellets, hemp, or pine, the floor of the brooder should be a place of comfort and support. Your choice of brooder bedding can set the tone for the rest of your chick season.
Safe Heat Sources: Heat Plate vs. Heat Lamp
Why Chicks Need Supplemental Heat
During the first weeks of their lives, baby chicks can’t control their own body temperature. Without a mother hen to keep them warm, they rely on us to provide a safe heat source. A consistent temperature is vital. Without it, chicks can quickly become chilled or overheated, leading to stress, health problems, or even death.
Our Experience with a Heat Lamp
When we brought home our first chicks, we used a traditional heat lamp. It seemed like a good idea at the time—easy to set up and affordable. But that red light glowing all night kept me awake with worry. I couldn’t stop checking the brooder. I was always afraid the chicks were too hot, or worse, that the lamp might fall and start a fire.
One night, we had a scary close call. The clamp holding the ceramic heat lamp slipped off the side of the tote. Thankfully, I checked it in time. But it shook me enough that we switched to a heat plate the next morning. I wanted a safe heat source that wouldn’t keep me up at night.

Why We Chose a Heat Plate Brooder
We chose a Brinsea Ecoglow heat plate, and it completely changed our chick-raising experience. Heat plates like the Ecoglow Safety Chick Brooder are designed to mimic the warmth of a mother hen. The chicks can go under the plate when they need warmth and come out when they don’t. No more constant temperature fluctuations. No more white light keeping them up at night.
Using a heat plate helped us raise calmer, happier chicks. There was less crowding, less peeping, and fewer signs of overheating. The chicks moved freely and seemed more active and healthy. A heat plate brooder also uses much less energy than a traditional lamp, which makes it a good option for families trying to lower electricity use.
The Downsides of Traditional Heat Lamps
Heat lamps, including ceramic heat bulbs and infrared bulbs, do work. They’re available at most feed stores and cost less upfront. But they come with risks. The biggest concern is fire hazard. Heat lamps get extremely hot and can easily ignite pine shavings, paper towels, or plastic tubs if they fall or get bumped.
They can also cause uneven heating inside the brooder box. One side may get too warm while the other stays too cool. Chicks will crowd under or away from the lamp, depending on how much heat they feel. This can lead to stress-related problems, including huddling, dehydration, or poor sleep.
The light from traditional lamps can also interfere with natural chick behavior. Constant white light confuses their day-night rhythm. Even infrared bulbs can make it hard for chicks to get proper rest.
Radiant Heaters as Another Option
For larger numbers of chicks or bigger brooders, radiant heaters can be a great option. These heaters mount securely and offer consistent warmth across a wider area. They don’t produce direct light or intense heat like a lamp. Instead, they warm the air and objects around them. Radiant heaters work well for meat chicks or anyone raising chicks in a drafty coop or garage.
How Much Heat Do Chicks Need?
The age of the chick matters when choosing your heat level. During the first week, the brooder should be around 95 degrees F. Each week after, you can lower the temperature by 5 degrees. By week five or six, many chicks are ready to wean off supplemental heat—especially if your home or outside temps are mild.
You’ll know chicks are too cold if they huddle tightly or peep loudly. Chicks that are too hot will pant, spread out, or avoid the heat source. Using a heat plate brooder allows them to self-regulate more naturally.
Final Thoughts on Heating Options
We feel so much better knowing our chicks are warm and safe under a heating plate. It gives us peace of mind and lets them rest more naturally. Whether you’re raising chicks in a plastic storage tote or an outdoor chicken coop, choosing the right heat source is one of the most important steps.
For our family, the heat plate was the right place to start this year. And honestly, I wouldn’t go back. If you’re just getting started with backyard chickens, investing in a safe heat source like the Brinsea Ecoglow is a great option.
Food and Water for New Chicks
Feeding Chicks in the First Days
From the first day you bring your chicks home, they need easy access to fresh water and chick starter feed. These early days are critical for helping baby chicks grow strong and healthy. We always place the feed and water close to the heat source but not directly under it, so they can find them without overheating.

Chick starter feed contains the nutrients they need during the first few weeks of their lives. It’s made specifically for young birds and supports rapid growth and feather development. After the first month, you can switch to grower feed depending on the age of the chick.
Choosing the Right Feeders and Waterers
We’ve tried a few different types of feeders and water systems over the years. Chick-sized feeders help prevent food waste and keep the brooder box cleaner. Larger open bowls can get knocked over easily, especially by curious or active chicks.
A chick waterer with a narrow lip helps prevent drowning and spills. You’ll need to clean and refill water containers daily, sometimes more often. Chicks are messy, and bits of bedding or feed often end up in the dish.
Nipple waterers are a good option if you’re raising chicks for more than a few weeks. They reduce mess and help keep the water source cleaner. But very small chicks may not understand how to use them at first, so we introduce them gradually.

Our Setup for Feeding and Watering
We place the chick waterer on a flat wood block or an upside-down dish to lift it slightly off the floor of the brooder. Or we use a waterer with legs to help lift it off of the ground. This helps keep pine shavings or brooder litter from getting kicked into the water. For feed, we use a long plastic feeder with small holes that prevent chicks from scratching it out with their beaks.
If you’re using a plastic tub or cardboard box, position the food and water along the edge or near the side of the tote. This keeps it out of the busiest traffic area, reducing spills and crowding.
Water Safety and Chick Health
New chicks need clean, fresh water at all times. Even one day without it can cause dehydration and health problems. On hot days or if you’re brooding chicks outside, check the water more often.
We learned this the hard way one chick season when a plastic waterer tipped over while we were out for a couple hours. By the time we got back, the bottom of the brooder was soaked, and the chicks were stressed and cold. Now we always double-check that the water source is steady and level.

Do Chicks Need Grit?
If your chicks are only eating commercial chick starter feed, they don’t need added grit. But if you start offering treats or small bits of greens, adding chick grit is a good idea. It helps them digest food properly and prevents digestive problems.
We usually wait until the chicks are at least a week old before adding anything extra to their diet. During those early days, simple and consistent is best.
Keeping Feeding Areas Dry and Clean
Spilled water and damp feed can lead to mold or attract pests. It’s important to keep the feeding area clean and dry to avoid food waste and stress-related problems.
If your brooder is inside, you’ll notice how quickly odors can build up with damp brooder bedding. Using pine shavings or wood pellets under the feeders helps absorb moisture and reduce odor.
We also rotate the feeder and waterer location every couple of days to keep any one area from getting too dirty.
A Healthy Start for Happy Chicks
The right food and water setup supports healthy chicks from the start. Whether you’re using a stock tank or a plastic storage tote, choose systems that reduce spills and make cleanup easier. Chick-sized feeders and sturdy water containers make all the difference.
This part of your chick brooder setup might seem small, but it plays a big role in how your first chickens grow. With clean water, proper feed, and the right setup, your backyard chickens will get a strong start in life.

Inside vs. Outside: Where to Place the Chick Brooder Setup
Starting Inside the Home
Many families begin raising chicks inside the house. It’s convenient, especially if this is your first time brooding chicks. You can check on them often, and temperature fluctuations are easier to control indoors. The warm, stable environment helps avoid early stress-related problems in baby chicks.
We’ve started chicks inside before and loved how close they were for daily checks. It’s reassuring during the first week when they’re most vulnerable. You can hear them peeping if something seems off and respond quickly.
But raising chicks inside isn’t always a good idea—especially with little kids in the house. Chicks create a surprising amount of dust, and the smell can build up fast. Even with brooder bedding like pine shavings, paper towles, or wood pellets, daily cleanup becomes a lot of work. It can be hard to keep a clean space when the floor of the brooder gets messy so fast.
Our Decision to Start Outside This Year
This chick season, we chose a different route. We have an extra coop out back that wasn’t in use. We cleaned it out, ran an extension cord to it, and set up the heat plate inside. The chicks moved in as soon as we got home.
It’s the same coop they’ll move into full-time when they’re ready, so this setup just made sense. Less back-and-forth, and no scrambling to move them later. Even with it being outside, the Brinsea Ecoglow heat plate kept them warm enough. We checked on them every few hours that first couple days and never found them cold or huddled.
If this is your first time with chicks, using the coop they’ll live in can be a great option. Just be sure you’ve secured it against temperature swings, drafts, and predators.
Brooding in a Garage, Barn, or Shed
An outside structure like a barn, garage, or shed gives you more space and helps keep chick dust out of your living areas. But it does take a little more prep.
We added hardware cloth to cover any open spots. Chicken wire also works, though it’s better for keeping chicks in than keeping predators out. A plastic lid or even a towel laid over part of the brooder can help block wind and retain warmth during cooler nights.
The key is consistency—baby chicks can’t handle sudden temperature drops, especially in the first few weeks of their lives.
Transitioning to Their Permanent Home
By the time chicks are a couple weeks old, they start feathering out and becoming more active. Depending on the age of the chick and the breed, they may be ready to explore more space in their future chicken coop around week three or four.
Meat chicks grow faster and may need more room sooner. Smaller breeds or slow-growing birds might need supplemental heat for longer, especially in spring weather.
Since we started ours in the actual coop, there won’t be a big move later. They’ll just gradually use more of the space as they grow, and we’ll raise the heating plate and adjust feed and water placement as needed.
What’s Right for Your Setup?
Whether you’re using a plastic tub inside or a pre-fab chicken coop outside, the right place depends on your home and family. We found that outside was the safer choice this time around. No more toddlers trying to “help,” and no more worry about fire hazards or mess in the house.
If you’re short on space or want less cleaning, setting up the brooder in a covered outdoor space is a good option. Just keep an eye on temperature fluctuations, and make sure there’s adequate space and protection from predators.
With a little planning, even a first-time chicken keeper can successfully brood chicks in their permanent home from day one.

Tools and Extras for Happy, Healthy Chicks
Basic Tools to Keep on Hand
Once your chick brooder setup is complete, a few extra tools can make the job easier. Chick-sized feeders and a chick waterer are the most important basics. They help reduce food waste and keep everything cleaner.
We always include a thermometer to monitor the temperature in the brooder. Keeping the right degrees F is essential, especially during the first week when they’re still adjusting and need steady warmth.
Too much heat or not enough can cause serious stress-related problems. Watch for signs like chicks panting, piling in corners, or staying far from the heat source. If they’re chirping loudly or spreading out too far, something may be off.
Keeping Chicks Clean and Comfortable
Sometimes young birds develop “poopy butt,” especially in the first couple days at home. We keep a medium-sized bowl of warm water and a soft washcloth nearby. Soaking and gently wiping helps clear any blockage without harming the chick’s delicate skin. It’s not fun, but catching it early can prevent bigger health problems.
This is more common when chicks are stressed or if they’ve had temperature fluctuations. It usually clears up quickly if you stay on top of it. We check each chick when we clean the brooder bedding or refill the water container.
Lighting and Sleep Patterns
We avoid using white light in the brooder. Constant bright light can disrupt their natural sleep patterns and increase stress. Instead, we rely on the gentle glow of the heat plate or natural light during the day. Chicks need periods of rest just like any young animal.
Creating a calm space helps raise healthy chicks. Too much noise, light, or movement can overstimulate them. We try to keep the brooder box in a low-traffic area and check in quietly throughout the day.
Watching for Early Health Signs
Daily observation is the best way to catch problems early. Lethargy, droopy wings, or chicks that isolate themselves may signal trouble. Make sure everyone is eating, drinking, and staying active.
Sometimes you’ll notice one chick growing slower than the others. In our experience, that’s not always something to panic about—but it’s worth keeping an eye on. With the right care and a warm, clean environment, most chicks thrive and catch up quickly.
These little touches help create a safe, healthy start for your flock. Raising chicks takes a little attention to detail, but the rewards are worth it.
Final Thoughts for Chick Brooder Setup at Home
Getting Through the First Week
The first week is always the most nerve-wracking, even if it’s not your first time. You’ll check on your baby chicks constantly. You’ll worry they’re too cold, too hot, or not eating enough. That’s completely normal.
We still go out several times a day during the first week, even with a heat plate and a safe setup. New chicks are fragile and adjusting to so many changes. Your calm, consistent presence makes a big difference during these first few days.
Starting with a good setup—from the brooder box to the water source—makes everything easier. A simple heat plate brooder, clean pine shavings, and easy-access feeders go a long way toward raising happy chicks.
Weeks Two Through Four: Watch Them Grow
After the first week, things start to smooth out. You’ll notice the chicks getting louder, more active, and more curious. They begin to test boundaries and stretch their wings. It’s exciting to see their personalities come out.
During this stage, keep monitoring brooder temperature and space. The number of chicks in your setup matters more now, as they need enough space to move, eat, and play without crowding. If you’re using something small like a plastic storage tote, consider upgrading to a stock tank or puppy playpen for larger numbers.
Add chick grit if you’re starting to introduce greens or treats. Be sure to offer fresh water and keep the feed area dry to avoid health problems.
This is also when you’ll start thinking about their permanent home. If they’re in a coop already, slowly introduce them to more space and daylight as the weather allows.
Moving to the Chicken Coop
Around week four or five, chicks begin to feather out and rely less on supplemental heat. Depending on your local weather and breed, this is usually when they’re ready to move fully into the chicken coop.
We leave the heating plate plugged in for a couple extra days, just in case the nights get cold. Then we start letting them explore the run in the warmer afternoons. Watching them scratch and peck for the first time outside is one of our favorite moments each chick season.
For those using a deep litter method, now’s the time to begin building it up in the main coop. Start layering pine shavings or hemp bedding in the new space. Add a little chick-safe grit to help them adjust to eating small bits off the ground.
Make sure your chicken wire or hardware cloth is secure, especially if you live in an area with predators. Happy chicks grow into healthy hens and roosters with a strong start and a safe environment.
A Few Last Encouragements for the Chick Brooder Setup
Whether this is your first batch of backyard chickens or your fifth, know that not everything has to be perfect. We’ve raised chicks in plastic tubs, a kiddie pool, and now an outdoor coop with a heating plate. Each time, we’ve learned something new.
Raising chicks naturally doesn’t have to be complicated. You don’t need the fanciest brooder or the most expensive heat source. What matters most is warmth, cleanliness, and your attention. A good idea is to keep things simple and stay consistent.
Even with a larger family, or limited space, you can raise healthy chicks. Adjust your brooder setup to what works for your home. If paper towels feel like too much work (they were for us), try pine shavings. If you’re worried about traditional heat lamps, a Brinsea Ecoglow or other heat plate is a safe heat source and worth every penny.
With some planning, a few supplies from feed stores, and daily check-ins, you’ll get through these first weeks of their lives smoothly. Watching small chicks grow into thriving young birds is such a rewarding experience.

Good Luck This Chick Season
Each year, bringing home new chicks reminds us of why we started raising chickens in the first place. There’s something about those tiny peeps, warm brooder boxes, and the rhythm of daily care that grounds you.
If you’re getting ready to raise your first chickens, I hope this guide gives you a clear path forward. Start with a safe, warm brooder box. Offer clean water and healthy feed. Choose the best heating option for your space. Watch your chicks closely, and adjust as needed.
Before you know it, your brooding chicks will be ready for their permanent home and pecking in the coop like they’ve always belonged.
Happy chick season—and good luck from our homestead to yours.
-
Easy Herbal Conditioner Bar Recipe with Chamomile & Calendula
Easy Herbal Conditioner Bar Recipe with Chamomile & Calendula This herbal conditioner bar recipe combines nourishing oils, cocoa butter, BTMS-50, and vitamin B5 for soft, manageable hair. It also features chamomile-infused coconut oil and calendula-infused olive oil for a special herbal touch. Unlike traditional bottled conditioner, solid conditioner bars are highly concentrated and require very…
-
The Best DIY Honey Foaming Face Wash | Glowing, Healthy Skin
The Best DIY Honey Foaming Face Wash for Glowing, Healthy Skin A Simple, Gentle Daily Cleanser You Can Feel Good About I have tried many cleansers over the years, both as a nurse and a busy mom. However, I kept coming back to simple, nourishing ingredients. This honey foaming face wash has become a favorite…
-
Simple Gentle Liver Detox Tea Recipe (Natural & Nourishing)
Gentle Liver Detox Tea Recipe (Natural and Nourishing) A Simple Way to Support Your Body Naturally As the seasons begin to shift, I often notice my body asking for a slower, gentler reset. After months of heavier foods and busy days, everything can start to feel a little sluggish. Instead of turning to harsh detoxes,…
-
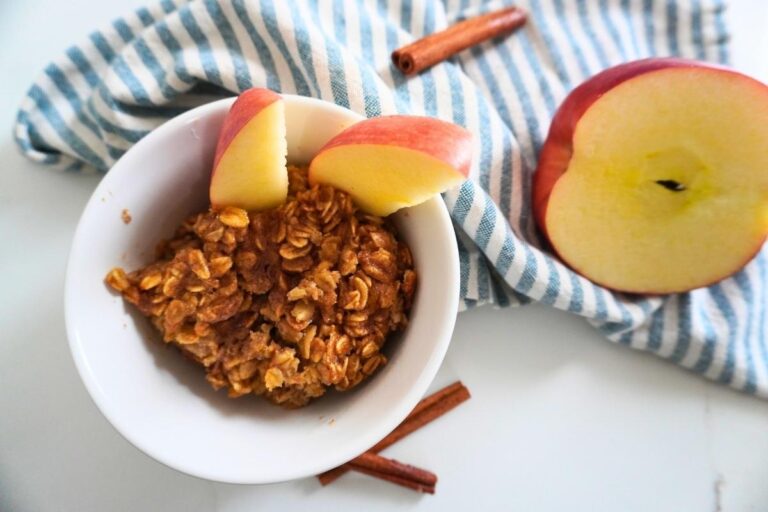
Easy Apple Cinnamon Baked Oatmeal Recipe
Apple Cinnamon Baked Oatmeal Recipe This apple cinnamon baked oatmeal recipe is one of those breakfasts that brings calm to busy mornings. I started making baked oatmeal when I needed something nourishing that could feed my family without extra work. This recipe comes together quickly, uses simple pantry staples, and bakes while the rest of…
-
Herbal Calendula and Chamomile Sugar Scrub
Herbal Calendula and Chamomile Sugar Scrub There is something deeply satisfying about making simple body care products with herbs you already know and trust. Over time, I’ve learned that our skin responds best to gentle, nourishing ingredients, especially when they come straight from the apothecary shelf or pantry. This calendula chamomile sugar scrub is one…
-
Apple Mint and Lemon Balm Calm Tea
Apple Mint and Lemon Balm Calm Tea A Gentle, Comforting Blend for Stressful Days When the day feels a little too loud, or your mind just won’t slow down, apple mint and lemon balm calm tea is one of my favorite ways to create a pocket of peace. As a mom of five and an…