The Best Herbal Medicine Recipes: Natural Healing with Herbs
Rise of Herbal Medicine
In this post, we’ll explore herbal medicine recipes that are simple to make and can be used for a variety of common ailments. Whether you’re looking to strengthen your immune system, relieve a sore throat, or treat skin issues, there’s a recipe here for you. Let’s dive into the world of herbal medicine and discover how you can use these powerful plants in your daily routine!
Herbal medicine has been used for centuries to heal and nourish the body. In recent years, there has been a growing interest in herbal medicine recipes as people seek alternatives to conventional medicine. Many are turning to herbs for everyday health support, from immune-boosting syrups to soothing teas and topical treatments.
Why Herbal Medicine?
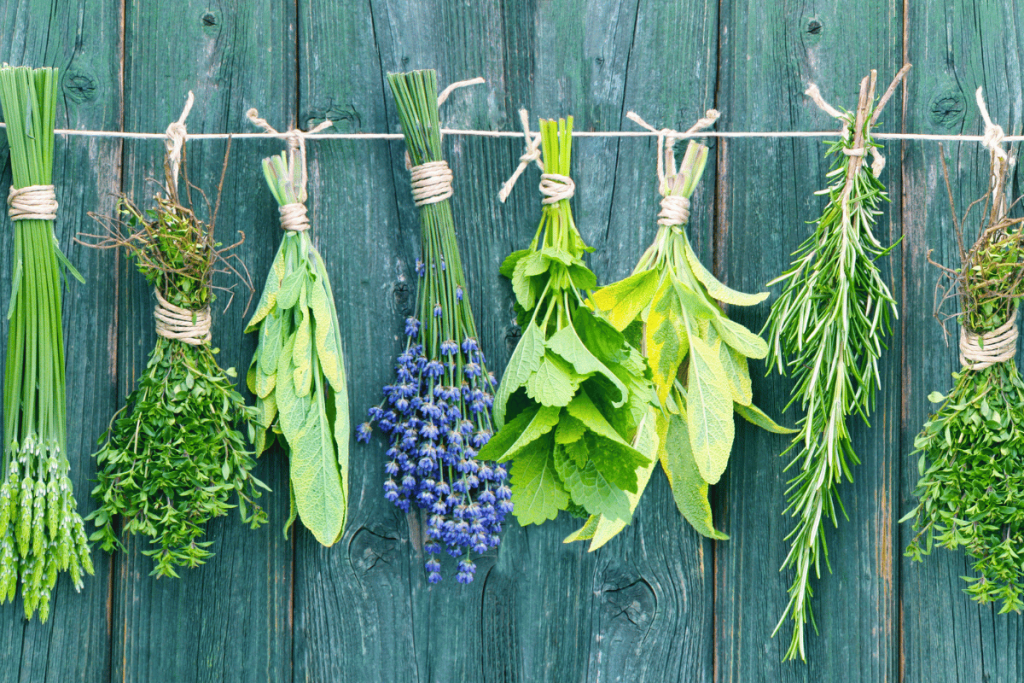
Herbal medicine is a wonderful way to support overall health and well-being. It’s been practiced for thousands of years across different cultures. When used properly, medicinal herbs can help balance the body, support the immune system, and promote healing.
One of the biggest benefits of using herbal medicine recipes is their ability to strengthen the immune system. Many herbs, like elderberry and echinacea, are known for their immune-boosting properties. Others, like chamomile and peppermint, aid in digestive health and help relieve common stomach issues like bloating or indigestion.
In recent years, the popularity of using herbal medicine recipes, herbal supplements, herbal tinctures, and herbal infusions has skyrocketed. These natural alternatives to conventional medicine offer a gentle yet effective way to support the body. People are becoming more mindful of what they put in their bodies, turning to plants for their medicinal properties instead of relying solely on pharmaceuticals.
Herbal medicine is a key part of a holistic health routine. It works with your body, rather than masking symptoms, to help restore balance.
Popular Medicinal Herbs and Their Benefits
Herbal medicine offers a wide range of plants with unique medicinal properties. Let’s explore some of the most popular herbs and their benefits.
Elderberry (Sambucus nigra): A Potent Herb for Boosting Immunity
Elderberry is well-known for its immune-boosting properties, especially during cold and flu season. Packed with antioxidants and vitamins, elderberry helps fight infections and reduces the severity and duration of illness. It is often used in syrups and tinctures to support the immune system and promote faster recovery.
Arnica (Arnica montana): Effective for Topical Treatments
Arnica is excellent for treating bruises, sore muscles, and other types of inflammation. It has powerful anti-inflammatory properties that make it ideal for topical application. Arnica is commonly used in salves and ointments to soothe pain, reduce swelling, and promote healing.
Lemon Balm (Melissa officinalis): Calming and Antiviral
Lemon balm is a calming herb, known for reducing stress and anxiety. It is also antiviral, making it beneficial for supporting the immune system. Lemon balm helps relieve tension, improve sleep quality, and promote a sense of relaxation.
St. John’s Wort (Hypericum perforatum): Mood-Lifting and Nerve-Calming
St. John’s Wort is well-known for its mood-lifting properties and is commonly used to alleviate symptoms of depression and anxiety. It also calms the nervous system, making it helpful for stress relief and emotional well-being.
Urtica dioica (Nettle): A Natural Remedy for Allergies and Skin Irritation
Nettle is an incredibly versatile herb, commonly used to treat allergies, urinary tract infections (UTIs), and skin irritation. It is rich in vitamins and minerals, which help support overall health, making it a popular choice in herbal teas and tinctures. Nettle is also known to aid in detoxification and support a healthy immune system.
Fire Cider: A Powerful Immune-Boosting Tonic
Fire cider is an herbal tonic made from a blend of ingredients like apple cider vinegar, garlic, ginger, onion, and hot peppers. It is renowned for its immune-boosting properties and ability to support digestion. Fire cider is also a great remedy for sinus infections, sore throats, and detoxification.
Nourishing Tea: A Comforting Herbal Remedy for Overall Health
Nourishing Tea combines herbs like nettles, chamomile, and ginger to support the immune system, digestion, and overall wellness. This herbal blend is rich in vitamins and minerals, offering a gentle yet effective way to support daily health. It’s a perfect tea for those looking to maintain balance and nourish their body from the inside out.
These herbs and their benefits are an excellent way to incorporate natural healing into your daily routine. They support your immune system, ease discomfort, and promote overall well-being, helping you stay healthy and balanced.
Herbal Medicine Recipes for Common Ailments
Herbal remedies are a fantastic way to support your health naturally. From flu season to sore muscles, these herbal recipes can be incorporated into your routine for everyday wellness. Below, I’ll walk you through some of the most effective and easy-to-make herbal remedies.
Elderberry Syrup: A Must-Have for Flu Season
Elderberry syrup is one of the best herbal remedies for boosting immunity and fighting off colds and flu. Known for its antiviral properties, elderberry can help reduce the severity and duration of cold symptoms, making it a go-to during flu season.
In my Elderberry Syrup Recipe post, I share a simple recipe using maple syrup as a sweetener, making it a safer option for children. The syrup can be taken daily for immune support or as needed when feeling under the weather.
If you want a super simple Elderberry Syrup option, I offer Elderberry Syrup Quick Kits in my online shop. These allow you to make your own without measuring and buying herbs in bulk.

Elderberry Syrup Recipe
This homemade elderberry syrup is a simple, effective way to boost your immune system, especially during cold and flu season. Packed with the immune-boosting properties of elderberries, echinacea, and rosehips, this syrup is easy to make and can be adjusted with different herbs based on your preferences. Here’s how to make it!
Ingredients:
- 5 cups water
- 1 cup dried elderberries (organic preferred)
- 1 tablespoon fresh ginger (or dried ginger as a substitute)
- 1/4 cup echinacea root
- 1/4 cup rosehips
- 2 sticks cinnamon
- 1 medium dried cayenne pepper (crush before adding)
- 1 cup raw honey (adjust to taste)
Instructions:
- Prepare the water: Pour 5 cups of water into a pot and set it on medium-low heat.
- Add the herbs: Add the dried elderberries, ginger, echinacea root, rosehips, cinnamon sticks, and cayenne pepper. Stir gently to combine.
- Simmer the mixture: Let the mixture come to a simmer, stirring occasionally. Allow it to simmer for about 1 to 2 hours, until the cinnamon sticks have softened, and the water level has reduced by at least 1 cup.
- Strain the syrup: Once the syrup has been reduced, strain the mixture through a mesh strainer into a large measuring cup or bowl to remove the herbs and berries. Let it cool to around 100°F (about body temperature).
- Add honey: While the mixture is cooling, add 1 cup of raw honey into a quart jar. Once the syrup has cooled, pour it into the jar and stir to combine.
- Store the syrup: Seal the jar with a leak-proof lid and allow the syrup to cool completely before storing it in the fridge. It will keep for up to 6 months.
Elderberry Syrup from Fresh Elderberries
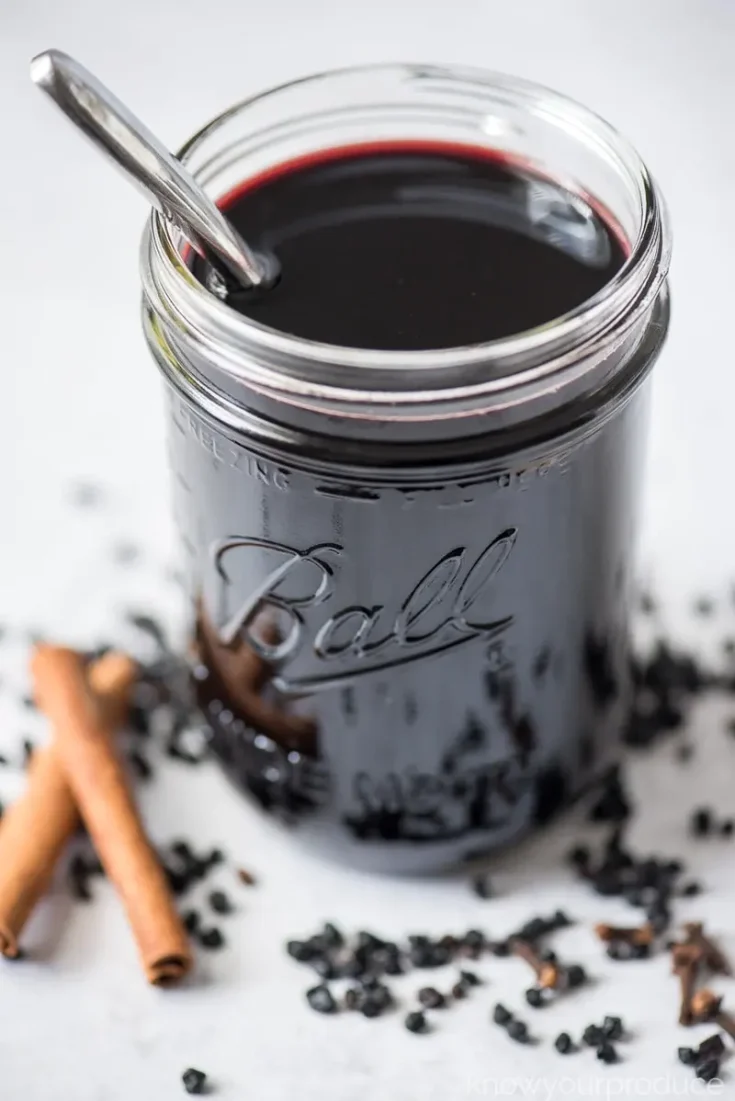
This is a quick and simple elderberry syrup recipe for fresh elderberries. You can add in or omit herbs as necessary. Below is a video tutorial with short step-by-step instructions for my original recipe.
Ingredients
- 4 cups water
- 2 cups fresh and rinsed elderberries. Organic is always best when possible
- 1 sticks cinnamon
- 3-4 whole cloves
- 1-2 cups raw honey. Can add less or more to taste or use maple syrup as a substitute.
Instructions
1. Pour water into the pot while on medium to low heat
2. Add in all of the herbs and do a quick stir.
3. Bring the mixture to a gentle simmer over medium heat. Allow it to simmer for 2-3 hours, stirring occasionally, until the liquid reduces by half.
4. Once the mixture has cooled to room temperature, strain it through a fine mesh sieve or fine mesh strainer to remove any solids, leaving you with a smooth elderberry liquid. While allowing the mixture to cool to approximately 100 ℉, add your honey into the quart jar. Once the mixture is cooled, pour into the jar and stir.
5. Finally, pour the syrup into a glass jar or mason jar. Store it in the refrigerator for up to 2-3 months (sometimes even longer), or freeze it in ice cube trays for longer storage.
Notes
Directions for use:
- Adult: Take 15-30ml daily for prophylaxis. Take a 2-day break every few weeks. Take 15-30ml 3-5 times a day if sick until healthy then take a 2-day break.
- Children: Take 5-7.5ml daily for prophylaxis. Take a 2-day break every few weeks. Take 5-7.5ml 3-5 times a day if sick until healthy then take a 2-day break.
- *Not recommended for under 1 year of age due to raw honey. Can substitute for maple syrup but will need to add lemon juice or ACV to help preserve.
Enjoy your homemade elderberry syrup, a natural and effective way to stay healthy through flu season! For more herbal remedies, check out my other blog posts on Arnica Salve and Nourishing Tea Recipes.
Arnica Salve: Relieve Sore Muscles and Bruising
Arnica is a powerful herb for reducing inflammation and speeding up recovery from bruising or muscle soreness. It is a wonderful topical remedy that can be applied directly to the skin to promote healing and comfort.
If you’re interested in making your own Arnica Salve, check out my blog post for a step-by-step guide. This salve is easy to prepare and can be a handy addition to your home apothecary for natural pain relief.
If you’d prefer to skip the DIY and get straight to the solution, this Arnica (pain) salve, is available in my online shop, Pioneer Health Ministry. It’s crafted with the same care and natural ingredients, ready to use whenever you need it!
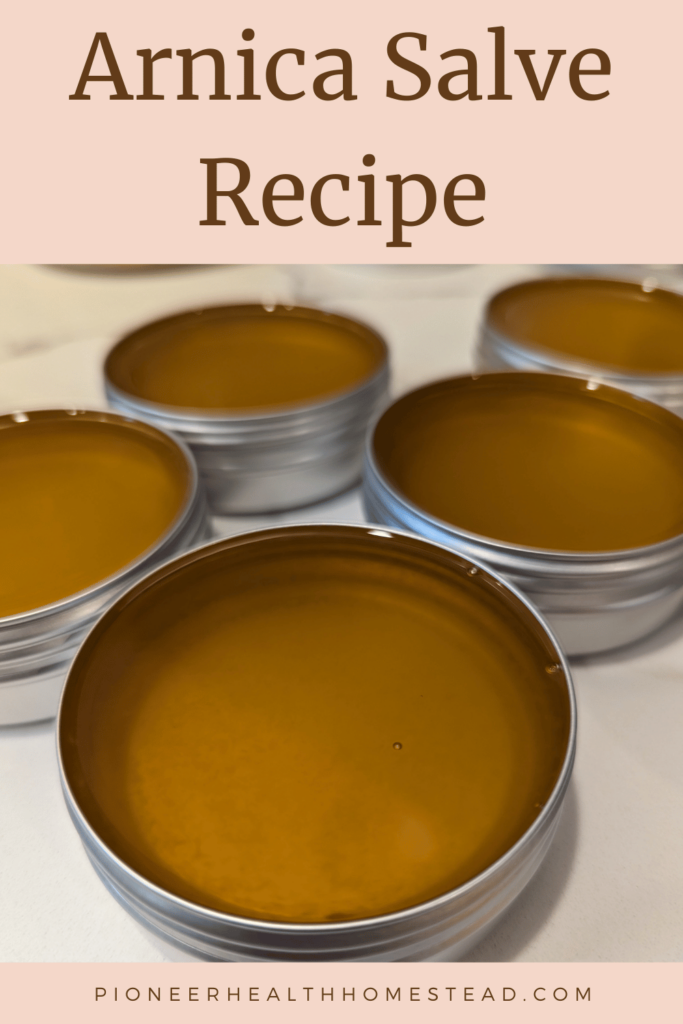
Arnica Salve Recipe: Step-by-Step Instructions
Key Ingredients:
- 1/2 cup Arnica-infused oil (prepared from arnica flowers)
- 1/2 cup (1 oz) Beeswax: To thicken the salve
Instructions:
- Prepare Your Infused Oil: Strain the arnica flowers from your infused oil using a fine-mesh strainer, leaving you with a clean and potent arnica-infused oil.
- Melt the Base Ingredients: In a heat-proof bowl set over a pan of simmering water (a double boiler), melt together the arnica-infused oil and beeswax until fully combined. If using other ingredients, add all but the essential oils to this step.
- Add in Essential Oils: If you’re using EO’s add them into the melted mixture before pouring into the container.
- Cool and Store: Pour the salve into a small glass jar or metal tin. Allow it to cool at room temperature before sealing.
- Storage: Keep the salve in a dark area to preserve its healing properties and avoid the risk of mold.
Optional Ingredients:
- 1 tsp Vitamin E Oil: A natural preservative that can help extend shelf life.
- 2 T Shea Butter: For a creamy texture.
- Essential Oils: For added benefits and fragrance, consider mixing in a small amount of essential oils like lavender, peppermint, or helichrysum. Recommended 5-15 drops total.
With this simple recipe, you’ll have a soothing homemade arnica salve ready to help relieve muscle pain and minor injuries!
Arnica Salve
Equipment
- 1 double boiler pot with glass container and towel underneath can work too!
- air tight container
Materials
- 1/2 cup Arnica-infused oil prepared from arnica flowers
- 1/2 cup 1 oz Beeswax
Instructions
- Prepare Your Infused Oil: Strain the arnica flowers from your infused oil using a fine-mesh strainer, leaving you with a clean and potent arnica-infused oil.
- Melt the Base Ingredients: In a heat-proof bowl set over a pan of simmering water (a double boiler), melt together the arnica-infused oil and beeswax until fully combined. If using other ingredients, add all but the essential oils to this step.
- Add in Essential Oils: If you’re using EO’s add them into the melted mixture before pouring into the container.
- Cool and Store: Pour the salve into a small glass jar or metal tin. Allow it to cool at room temperature before sealing.
- Storage: Keep the salve in a dark area to preserve its healing properties and avoid the risk of mold.
- Optional Ingredients:
- 1 tsp Vitamin E Oil: A natural preservative that can help extend shelf life.
- 2 T Shea Butter: For a creamy texture.
- Essential Oils: For added benefits and fragrance, consider mixing in a small amount of essential oils like lavender, peppermint, or helichrysum. Recommended 5-15 drops total.
Notes
Bug Repellent Lotion: A Natural Alternative to Chemical Sprays
When you’re looking to avoid harsh chemicals, a homemade bug-repellent lotion is a fantastic alternative. This all-natural lotion, made with olive oil and essential oils, is safe for the entire family and works effectively to keep bugs at bay. Unlike many commercial sprays, it offers a protective barrier without the toxins often found in synthetic repellents.
The ingredients in this bug repellent lotion are gentle on the skin while providing effective protection. It’s a perfect choice for anyone looking to enjoy the outdoors while avoiding chemicals in personal care products. Whether you’re planning a family hike, a camping trip, or simply a day in the backyard, this lotion will help keep you safe from pesky insects.
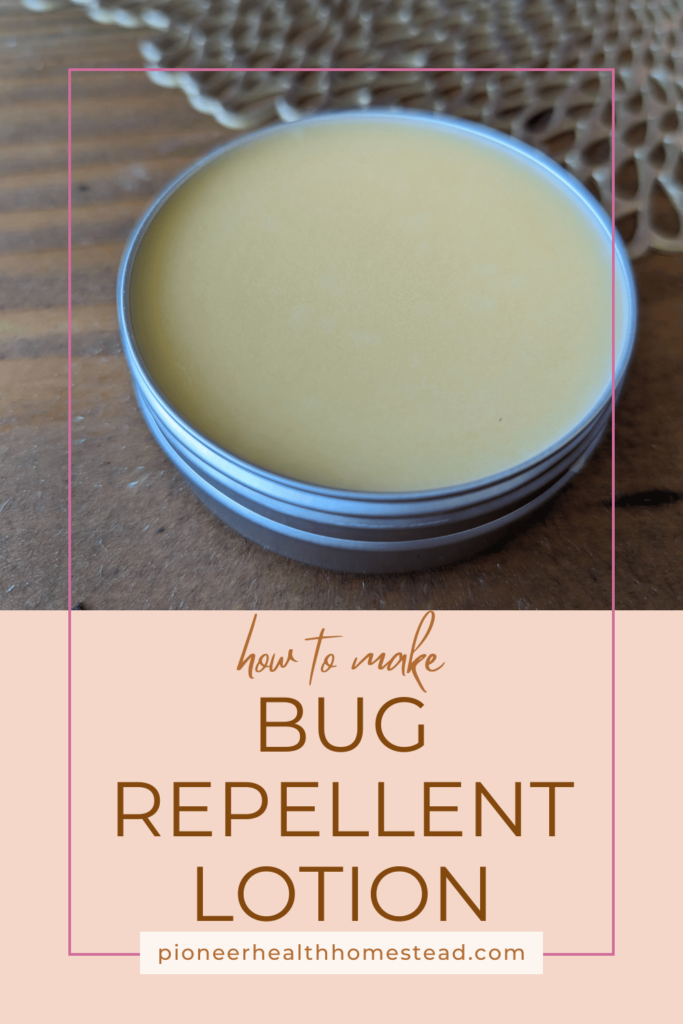
I’ve shared an easy-to-follow recipe for this natural bug repellent lotion in my blog. It’s a great addition to your wellness routine and is ideal for summer outings or any outdoor adventure. You can whip up a batch for yourself or your loved ones, knowing it’s a safer option for your skin.
If you’d prefer to skip the DIY and get straight to the solution, this Bug Repellent Lotion is available in my online shop, Pioneer Health Ministry. It’s crafted with the same care and natural ingredients, ready to use whenever you need it!
Natural Bug Repellent Lotion
Equipment
- 1 double boiler or a pan with a towel at the bottom and a glass jar or measuring cup
- jars or other airtight containers
Materials
Ingredients
- 1 cup coconut oil
- 1 cup cocoa butter mango butter, or shea butter (or a combination of these)
- 1 cup beeswax
- 30 drops bug repellent essential oils TerraShield from doTERRA
Optional Ingredients
- 2 tablespoons Sweet Almond Oil
- 2 tablespoons Avocado Oil
- 2 tablespoons Hemp Seed Oil
Instructions
- Prepare Ingredients: Measure out all ingredients and ensure you have everything ready. You can use either cocoa butter, mango butter, shea butter, or a combination to make up the 1 cup.
- Melt the Ingredients: In a double boiler, combine the coconut oil, cocoa butter/shea butter/mango butter, and beeswax. If you don’t have a double boiler, place a towel at the bottom of a pan and set a glass jar or measuring cup on top. Fill the pan with water until it reaches halfway up the side of the jar or measuring cup. Heat gently, stirring occasionally, until all ingredients are completely melted and combined.
- Add Optional Ingredients: Once the main ingredients are melted, stir in the optional ingredients (2 tablespoons of sweet almond oil, 2 tablespoons of avocado oil, and 2 tablespoons of hemp seed oil). Mix thoroughly to ensure even distribution.
- Remove from Heat: Once everything is melted and combined, remove the mixture from the heat and let it cool slightly, but not so much that it begins to solidify.
- Add Essential Oils: Stir in 30 drops of TerraShield essential oil blend, mixing thoroughly to ensure the oils are evenly distributed throughout the mixture.
- Pour into Container: Pour the mixture into a glass or tin jar for storage. Ensure the container is clean and dry before use.
- Cool and Solidify: Allow the mixture to cool and solidify completely. This can take several hours at room temperature or about an hour in the refrigerator.
- Store Properly: Store the lotion in a cool, dry place. For convenience, keep a small jar or tin container for easy access.
- Application: To use, take a small amount from the jar and rub onto the desired skin area. The warmth of your skin will melt a small amount of the lotion, providing a protective layer that repels insects.
Notes
Benefits of DIY Natural Bug Repellent Lotion
- Customization: Control over the ingredients allows you to adjust the scent and potency of the repellent.
- Cost-effective: Making your own bug repellent lotion can be more economical compared to purchasing commercial products.
- Natural Ingredients: Ensure your lotion is free from harmful chemicals and suitable for all skin types.
Fire Cider: A Powerful Immune-Boosting Tonic
Fire cider is an herbal remedy that combines ingredients like apple cider vinegar, garlic, ginger, onion, and hot peppers to help support the immune system and fight off illness. Known for its powerful anti-inflammatory and detoxifying properties, fire cider can be taken as a daily tonic during the winter months or when you’re feeling run down.
For a more in-depth look, check out Rosemary Gladstar’s Fire Cider book, which offers a detailed recipe and instructions for making your own immune-boosting remedy at home. This is a great addition to your winter wellness routine.
Fire Cider Recipe
Fire cider is a spicy, immune-boosting herbal tonic that combines powerful ingredients like garlic, ginger, horseradish, and cayenne pepper. It’s a fantastic remedy for supporting the immune system, improving digestion, and fighting inflammation. Best of all, it’s easy to make at home!
In addition to this recipe, you can download my free herbal recipe ebook that includes this fire cider recipe and many more natural remedies. Let’s dive into how to make your own fire cider!
Ingredients:
- Cayenne pepper (fresh chopped or dried) to taste
- 1/2 cup chopped onions (or more, based on preference)
- 1/2 cup chopped garlic (more if you like a stronger garlic flavor)
- 1/2 cup grated fresh horseradish root (or more if desired)
- 1/4 cup grated ginger root
- 1/4 cup grated turmeric root (fresh is best)
- 3 tablespoons fresh oregano
- 3 tablespoons fresh thyme
- Apple cider vinegar (ACV) (enough to cover herbs by at least 3 inches)
- Honey (to taste)
Instructions:
- Prepare the herbs: Place all the chopped and grated herbs (cayenne, onions, garlic, horseradish, ginger, turmeric, oregano, and thyme) into a half-gallon jar. If needed, use a larger jar to accommodate all the herbs.
- Add apple cider vinegar: Pour enough apple cider vinegar over the herbs to cover them by at least 3 inches.
- Seal the jar: Seal the jar with an airtight lid and place it in a warm spot, like a kitchen counter or pantry.
- Let the herbs infuse: Let the jar sit for no less than 3 weeks. Shake the jar at least once daily to help with the maceration process and to evenly infuse the vinegar with the herbal properties.
- Strain the herbs: After at least 3 weeks, strain the liquid using a mesh strainer. Compost the herbs and reserve the infused liquid.
- Heat the liquid: Pour the liquid into a medium-sized pot and warm it on low heat. Be sure not to overheat the mixture (keep it below 100°F) so the honey retains its medicinal properties.
- Add honey: While the liquid is warming, add honey to taste. Stir the mixture until the honey is completely dissolved, but do not heat it too much to preserve its beneficial properties.
- Bottle and store: Once mixed, bottle the fire cider in a clean jar or bottle and label it. Store it in a cool pantry for several months or in the refrigerator for an even longer shelf life.
How to Use Fire Cider:
- Take a small shot daily to keep your immune system strong.
- Teaspoon doses throughout the day are helpful if you’ve been exposed to illness or are starting to feel unwell.
Download Your Free Herbal Recipe Ebook!
Are you looking for more ways to incorporate herbal remedies into your routine? Download my free herbal recipe ebook for a collection of simple, effective recipes—including this fire cider recipe! You’ll find even more natural remedies to support your health, from immune-boosting syrups to soothing teas and topical treatments.
Stay healthy and enjoy the healing power of herbs!
Nourishing Tea: A Soothing, Nutrient-Rich Drink for Overall Health
Nourishing tea is a wonderful herbal blend that combines the benefits of nettles, chamomile, and ginger. This tea offers calming, immune-boosting, and digestive properties, making it an excellent choice during times of stress, illness, or whenever you’re looking to support your body’s natural healing process. The combination of these herbs works together to provide gentle nourishment and promote overall health.

Nettle is known for its high nutrient content, particularly its ability to support the immune system and provide relief from inflammation. Chamomile offers a calming effect, perfect for reducing stress and promoting restful sleep, while ginger helps with digestion and circulation. Together, they make this tea a powerhouse of natural support for your body.
I’ve shared my Nourishing Tea Recipe on the blog, where you can learn how to make this comforting, nutrient-packed drink at home. It’s a perfect beverage to sip on when you’re looking to relax or recover, and it’s gentle enough to enjoy every day as part of your wellness routine.
Nourishing (NORA) Tea
Equipment
- 1 Fine Mesh Strainer or Tea Infuser
- 1 Kettle or Pot for Boiling Water saucepan for heating water
- Measuring Spoons
Ingredients
- 1 teaspoon nettle leaves
- 1 teaspoon oat straw
- 1 teaspoon red raspberry leaves
- 1 teaspoon alfalfa leaves
Instructions
- Measure out 1 teaspoon each of nettle leaves, oat straw, red raspberry leaves, and alfalfa leaves. Place these herbs into a teapot or heat-resistant container.
- Boil 8 ounces (1 cup) of water. Once the water reaches a boil, pour it over the herbs in the teapot or container.
- Cover the container with a lid or a plate to retain the steam, allowing the herbs to steep for 10-15 minutes.
- After steeping, strain the tea into a cup using a fine mesh strainer or tea infuser to remove the herbs.
- Your NORA tea is now ready to be enjoyed. You can drink it plain or add honey, lemon, or your preferred sweetener to taste.
Notes
If you’d rather skip the brewing and enjoy the benefits right away, you can find Nourishing Tea available in my online shop, Pioneer Health Ministry. It’s made with the same thoughtful care and nourishing ingredients, ready for you to enjoy whenever you need a boost to your health.
These herbal remedies are wonderful tools to add to your wellness routine. Whether you’re looking to boost your immune system, relieve sore muscles, or keep bugs away, there’s a natural remedy that can help.
How to Prepare Herbal Remedies
Herbal remedies can be a simple and effective way to support your health using easy-to-find ingredients. Whether you’re making tinctures, salves, or syrups, the process is relatively straightforward and can be done at home with minimal tools. You can also find many tutorials on how to prepare these remedies on my YouTube channel, where I walk you through the steps for making these natural health solutions.
Making Herbal Tinctures
Tinctures are concentrated herbal extracts made by soaking dried herbs in alcohol or vinegar. They are easy to make and allow you to harness the full medicinal benefits of herbs.
Herbal Tincture Recipe:To make a basic herbal tincture, you’ll need dried herbs like echinacea, nettle, or calendula, along with alcohol (such as vodka) or apple cider vinegar. Follow the simple steps in the recipe to create your tincture and store it in a dark place to infuse for a few weeks. Be sure to check out my YouTube channel for a visual guide on how to make your own tinctures!
Making Herbal Salves
Herbal salves are topical preparations made by infusing herbs in oils and then thickening them with beeswax. These salves are ideal for soothing sore muscles, healing skin, and reducing inflammation.
Herbal Salve Recipe:Check out my Arnica Salve Recipe in my previous blog post for a step-by-step guide on making a healing salve at home. You’ll learn how to infuse oils and blend them with beeswax for a soothing topical remedy. For a detailed tutorial, visit my YouTube channel, where I demonstrate how to make herbal salves from start to finish.
Using a Double Boiler for Salves and Oils
When making salves or oils, it’s best to use a double boiler method. This allows you to gently heat your herbs and oils without exposing them to direct heat, preserving their delicate medicinal properties. The double boiler keeps the ingredients at a safe, even temperature to maximize their effectiveness. For a visual guide on this method, be sure to check out my YouTube channel.
By following these basic methods, you can easily create your own herbal remedies at home to support your well-being naturally. Be sure to visit my YouTube channel for more tutorials on preparing herbal remedies and making your own natural health products!
Save for Later!
Scientific Evidence and Herbal Medicine
Herbal remedies have been used for centuries to treat a wide range of health issues, and modern science is beginning to confirm their effectiveness. Research studies, including double-blind trials and clinical trials, have demonstrated the benefits of herbs like elderberry and echinacea for immune support, particularly in fighting colds and the flu. Elderberry, for example, has been shown in studies to reduce the duration and severity of flu symptoms, while echinacea is commonly used to boost the immune system and prevent infections.
However, while herbal medicine recipes show promise, it’s important to remember that herbal medicine is not a substitute for professional medical advice. Before starting any new herbal treatments—especially for people with existing health conditions or those taking prescription medications—consulting a healthcare provider is essential. Herbs can interact with medications or affect pre-existing health conditions, so it’s crucial to make sure any herbal remedy is safe and appropriate for your unique situation.
Disclaimer: The information shared in this blog is for educational purposes only and is not intended as medical advice. Always consult with your healthcare provider before making any changes to your wellness routine or incorporating new herbal remedies.
Creating Your Own Home Apothecary with Herbal Medicine Recipes
A home apothecary is a wonderful way to have essential herbal products on hand for everyday health support. Starting your own collection of tinctures, salves, syrups, and teas allows you to take a more active role in your wellness, and many simple herbal remedies are easy to prepare and store.
Start with basics like elderberry syrup, fire cider, and arnica salve—these are easy to make and incredibly effective for supporting the immune system and soothing sore muscles. Once you’re comfortable with these, you can expand to more advanced preparations like herbal tinctures.
To create a home apothecary, you’ll need a good source for dried herbs and fresh herbs. Look for trusted suppliers who offer organic, high-quality herbs. If you have the space, consider growing your own medicinal herbs at home for easy access to fresh ingredients. Building your home apothecary not only empowers you to take charge of your health but also allows you to enjoy the process of working with plants and creating your own natural remedies.
Safety Tips for Using Herbal Medicine Recipes
Herbs are a powerful tool in natural medicine, but it’s important to use them safely and responsibly. Here are some key safety tips to keep in mind:
- Start Small: When trying a new herb, begin with small amounts to see how your body responds. Herbs can have a strong effect, and it’s always better to start with a gentle approach.
- Proper Storage: Keep your dried herbs and herbal preparations in a cool, dry place, away from direct sunlight. Store tinctures and salves in glass jars with tight-fitting lids to preserve their potency.
- Monitor for Allergies: As with any new product, it’s important to monitor for allergic reactions when using a new herbal remedy. If you notice any irritation, itching, or discomfort, discontinue use and consult with your healthcare provider.
- Consult a Healthcare Provider: Always consult with a healthcare provider before starting any new herbal remedy, particularly if you are on prescription medications or have underlying health conditions. Some herbs may interact with medications, so it’s crucial to make sure the herbs you use are safe for you.
Conclusion
Using herbal medicine recipes, is a powerful and natural way to support your health, offering a range of benefits from immune support to pain relief. Through the recipes shared in this blog, you can begin exploring the world of medicinal herbs and create your own natural remedies. Whether it’s elderberry syrup, fire cider, or arnica salve, these homemade products are not only effective but also a fun and empowering way to care for your body.
However, it’s important to remember that while herbs can enhance your wellness routine, they should always be used responsibly and in conjunction with medical advice when necessary. Start small, create your own home apothecary, and embrace the healing power of nature.
Let Me Know!
Ready to dive into these herbal medicine recipes? Start by making your own elderberry syrup, fire cider, or arnica salve today! Visit my blog for more detailed herbal medicine recipes and check out my online shop for more natural remedies to support your health without the fus.
Benefits of Homemade Soap: Reasons for Natural and Handmade
Sharing is caring! Facebook Pinterest Twitter Benefits of Homemade Soap: Reasons for Natural and Handmade Introduction to the Benefits of Homemade Soap The benefits of homemade soap are gaining attention as people prioritize natural products in personal care routines. Unlike commercial soaps, homemade soap offers natural, skin-friendly alternatives made with high-quality ingredients. It’s a better…
The Best Home Remedies for Ear Infection While Pregnant
The Best Home Remedies for Ear Infection While Pregnant Introduction to Ear Infections During Pregnancy Home remedies for ear infection while pregnant are often sought by expectant mothers dealing with the discomfort of ear pain. Pregnancy can weaken the immune system, making you more vulnerable to ear infections. Hormonal changes and increased blood flow during…
Herbalism for Beginners: Comprehensive and Practical Guide
Herbalism for Beginners: Comprehensive and Practical Guide Herbalism for Beginners In this blog post, I will discuss that herbalism for beginners can be a wonderful way to explore the healing power of nature. Herbalism is the practice of using plants for medicinal purposes, and it has been around for centuries. In ancient times, people relied…
The Best Guide to Starting Seeds Outdoors: Tips and Tricks
The Best Guide to Starting Seeds Outdoors: Tips and Tricks The Joy of Starting Seeds Outdoors Starting seeds outdoors is a rewarding way to launch your gardening journey. Few things compare to watching a garden grow from seeds you planted yourself. With each sprout, there’s a new feeling of accomplishment. Growing from seed lets you care…
How to Guide for Starting Jalapeno Seeds Indoors
How to Guide for Starting Jalapeno Seeds Indoors Starting Jalapeno Seeds Indoors: A Step-By-Step Guide Starting jalapeno seeds indoors is a rewarding experience that lets you grow vibrant, spicy peppers from the very beginning. Watching those tiny seeds transform into productive jalapeno plants brings satisfaction, especially for anyone passionate about home gardening. Starting seeds indoors…
Easy Discard Sourdough Herb Crackers Recipe
Easy Discard Sourdough Herb Crackers Recipe Discard Sourdough Herb Crackers Sourdough herb crackers are a crunchy, delicious way to use up sourdough discard. If you bake sourdough bread, you know how much starter can be left over. Instead of wasting it, why not make something tasty? These herb crackers are the perfect way to put…
